
Last updated November 17, 2026
 Architectural shingles
 Metal roofing
 Tile roofing
 GAF
 Owens Corning
 Flat & low-slope
Free roof inspection with deck photos before we talk money - GAF and Owens Corning certified installation
Roof Replacement & Installation Troubleshooting: Common Problems and How to Fix Them
Here is the part of roofing nobody puts on a brochure: a brand-new roof can look flawless from the curb and still have three or four points on it that will leak within the first year. Those points almost never come from bad shingles. They come from skipped steps during installation – steps that take a few minutes to do correctly and a few minutes to skip when a crew is rushing to the next job. A tucked-under piece of flashing, a collar that was never sealed, a row of nails set too low. None of it shows up in a final walkthrough. All of it shows up after the first hard rain. If you’re a Spring Valley homeowner who just had a roof installed and something feels off, this guide is for you. We’ll walk through the defects that survive inspection, how to check your own roof over the first 90 days, what your workmanship warranty actually covers, and how to put a complaint in writing so it holds.
Styles & brands we work with
- Architectural shingles
- Metal roofing
- Tile roofing
- GAF
- Owens Corning
- Flat & low-slope
Quick Answer
Most problems after a new roof installation aren’t material failures – they’re installation sequencing failures that passed a visual walkthrough but created moisture pathways. The five defects that slip past final inspection most often are exposed nail heads, inadequate flashing overlap, unsealed pipe boot collars, improperly seated ridge vents, and gutters that were never reattached correctly. A careful homeowner inspection at 30, 60, and 90 days catches nearly all of them before they become interior damage, and a written workmanship warranty is what makes a contractor come back and fix it.
Table of Contents
- Why New Roofs Fail Even When the Shingles Are Fine
- The Five Post-Installation Defects That Survive the Final Walkthrough
- How to Do Your Own 90-Day Post-Installation Inspection
- Settling vs. Movement: What a New Roof Should and Shouldn’t Do
- What Workmanship Warranty Covers vs. What Manufacturers Cover
- How to Document and Report a Post-Installation Problem in Writing
- Spring Valley-Specific Issues: Heat Cycles, Monsoon Rain, and Desert Wind
- Common Mistakes to Avoid
- When to Call a Professional
- Frequently Asked Questions
Why New Roofs Fail Even When the Shingles Are Fine
Shingles do their job when the layers beneath them do theirs. A roof is a system: decking, underlayment, flashing, ventilation, and ridge cap all working as one assembly. When a shingle is defective, it usually fails visibly and in one pattern. When installation is defective, the failure is hidden and scattered – one wall intersection this year, one pipe boot the next. In Spring Valley, where summer temperatures regularly push past 105°F and the monsoon season delivers hard, wind-driven rain in short bursts, those hidden defects get pressure-tested fast. A flashing lap that was overlapped the wrong direction by half an inch will hold through a dry spring and give up in August.
What makes this harder is that the failure has nothing to do with the material brand. A homeowner with a GAF or CertainTeed system installed poorly will have worse problems than a homeowner with a mid-tier system installed correctly. That’s why we spend more time during a replacement installation on sequencing than anything else – the order in which components overlap, the direction water has to travel, the foil, the seal, the vent edge. The roof either sheds water the way it was engineered to or it doesn’t. When it doesn’t, the fix is almost always in the details, not the shingles.
The good news: every defect we describe below has a known fix, and none of them requires tearing off a healthy roof. If you suspect a problem, start with our Roof Repair in Spring Valley page – post-installation fixes generally fall under repair work, not full replacement.
The Five Post-Installation Defects That Survive the Final Walkthrough
We’ve inspected enough roofs across Spring Valley, Henderson, and the surrounding valley to know the same five problems account for the majority of first-year leaks after an installation. Here they are, in order of how often we find them.
1. Exposed Nail Heads
The fastener either lands on the shingle nailing line or it doesn’t. When a nail is set too low or too high, it punches through the shingle above it and sits exposed to the weather. From the ground, you’ll never see it. From the roof, an exposed nail head is a visible rust spot after the first season. A shingle nail with its head showing is a guaranteed leak point in 12 to 24 months. Required correction: each exposed nail should be sealed with roofing-grade sealant, or the surrounding shingles replaced.
2. Inadequate Flashing Overlap
Flashing at walls, chimneys, and valleys must lap in the direction water flows – upper layers over lower, never the reverse. A one-inch reversal creates a capillary channel that pulls water uphill into the deck. This is the single most common post-installation defect we find and the one most often missed by inspectors focused on shingle alignment.
3. Unsealed Pipe Boot Collars
The rubber collar around a plumbing vent is supposed to be sealed at the top edge and where it meets the shingle. Skip either seal and the collar will harden in the desert heat within a season. Once it cracks, water runs straight down the pipe and into the ceiling below. In Spring Valley, this defect often shows up as a ceiling stain near a bathroom long before any roof leak is suspected.
4. Improper Ridge Vent Seating
Ridge vents have to be seated flush with the ridge line and then covered by ridge cap shingles. If the vent is misaligned by a quarter inch, wind-driven monsoon rain can drive under the cap. If it’s seated but the caps were overdriven, the vent material cracks. Either way, the roof ventilates poorly or leaks.
5. Gutter Reattachment Failures
Gutters come off during a replacement. That’s normal. What’s not normal is hanging them back without re-pitching to the original slope or without re-flashing the fascia. After the first rain, water backs under the drip edge and into the fascia board. If you notice a sagging gutter line or water pouring off the wrong end after a new roof was installed, this is usually the cause. Our Specialty Roofing in Spring Valley page covers gutter and accessory work in more detail.
If your roof has any of the above, it’s fixable. None of them mean the whole install was bad. They mean the sequencing had gaps.
How to Do Your Own 90-Day Post-Installation Inspection
You paid for the roof; a short, careful walk-around is a reasonable thing to do. Do not climb onto the roof if you’re not comfortable on ladders or if the pitch is steep – what follows can be done safely from the ground, from a second-story window, or with binoculars.
- Day 1 (or as soon as the crew leaves): Walk the perimeter and photograph every elevation. Note the gutter line, downspouts, and any area near a chimney, skylight, or wall intersection. Save the photos on your phone with the date.
- Day 1, attic check: Look up at the roof deck from inside the attic. Any daylight visible through the sheathing indicates a fastening or vent issue. Note the temperature – do not perform this check in extreme heat.
- Day 7: After the first rain (or an hour of running a hose at a flashing point during a dry spell), look for water stains on ceilings, in the attic, or along the fascia. Check that gutters are draining fully.
- Day 30: From the ground, look for drifted or missing granules at downspout discharge – some granule loss is normal, a heavy concentration in one spot is not. Check for any exposed nail heads using binoculars along the ridge.
- Day 60: Inspect the ridge vent line for cracking or lifting ridge cap shingles. Check flashing points at the chimney and any step walls.
- Day 90: Do a full photographic set again. Compare to your Day 1 photos. Any change in the shape of the roof – sag, dip, or ribbing – goes in the file.
Every quality contractor runs a checklist like this during install. If yours did, your 90-day inspection should mostly confirm what’s already right. If your inspection turns up anything on the list of five defects, you now have a paper trail.
Settling vs. Movement: What a New Roof Should and Shouldn’t Do
A new roof settles. Shingles flatten into the deck, sealant strips activate under the first weeks of sun, and the whole assembly relaxes into its final shape. A few months in, some ripples in the shingle field are normal and expected. What is not normal is movement.
The distinction matters for two reasons. First, it tells you whether you have a call to make. Second, it tells a contractor whether they’re looking at a shingle issue or a decking issue.
- Normal settling: Slight waviness in the shingle field after the first heat cycle. Minor granule shedding in the first 30 days. Small gaps at the ridge cap edges that close in.
- Normal settling: Sealant strips activating fully in the first 6-8 weeks of warm weather. This is the roof “curing” into place.
- Investigate: Any section of the shingle field that dips relative to its neighbors. This can mean a soft deck board underneath.
- Investigate: Ridge line that visibly sags between rafters. Not a shingle problem – that’s a framing or decking problem.
- Investigate: Shingles curling at the edges before 12 months. In Spring Valley heat this typically points to a ventilation deficiency, not a shingle defect.
- Investigate: Any gap between the shingles and a flashing edge that grows over 30 days. That’s not settling – that’s a structural movement or a flashing failure.
Take a dated photo of anything that concerns you. Compare to the same spot 30 days later. If the change is measurable, call the original installing contractor. If they don’t respond, that’s a separate problem – and the reason a written workmanship warranty matters.
What Workmanship Warranty Covers vs. What Manufacturers Cover
This is where most disputes live. The manufacturer’s warranty covers material defects – a shingle that delaminates, a vent that cracks from manufacturing fault, an underlayment that fails on its own. What it does not cover is how the roof was installed. If the shingle was fine and the nail was driven through it, the shingle manufacturer will decline the claim and point at the installation.
The installing contractor’s workmanship warranty is what covers installation error. Every roofing company defines theirs differently, which is the problem. Before you sign anything, ask two questions: how long is the workmanship warranty, and what specifically does it cover?
At Ridgeline Roofing Co. Spring Valley, our answer is the 90-Day Done Right Promise. It’s a written workmanship guarantee that runs for 90 days from project completion. If something we installed isn’t right, we come back and make it right – no paperwork runaround, no arguing about whose fault it was, no third-party verification process. We document every inspection and installation with photos from the actual roof, which makes both sides of the conversation shorter.
Two things worth knowing about workmanship warranties in general, since this is where homeowner disputes get stuck:
- A manufacturer’s material warranty follows the shingles, not the roof. If the shingles change hands because the installer replaces them, the manufacturer covers its product; your contractor covers labor and installation.
- The gap between a manufacturer’s warranty and a contractor’s warranty is where “it’s not our problem” lives. Any well-written workmanship warranty closes that gap for the period it covers. Read the period carefully.
Protecting workmanship is also one of the reasons we limit our replacements to lines we’re authorized to install – GAF, CertainTeed, and Owens Corning among them. When we know the material, we can stand behind the installation. Our Roof Replacement & Installation in Spring Valley page covers how we sequence a replacement, if you want to know what a good install looks like before yours goes on.
How to Document and Report a Post-Installation Problem in Writing
A verbal phone call is not a paper trail. If you have a problem with a new roof, put it in writing in a way a warranty adjuster or small-claims judge would find irrefutable. Here’s the sequence that works.
- Photograph everything with a date stamp. Your phone already timestamps photos. Take wide shots showing the problem in context and close-ups showing the detail.
- Write down what you observed and when. One paragraph per defect: the date you noticed it, what you saw, where on the roof, and whether it followed a rain event or a heat wave. Include the interior photos if there’s water staining.
- Send it in writing within a reasonable window. Email is best. Text works if it’s the only channel, but save a screenshot. A written workmanship warranty generally requires you to notify the contractor in writing to trigger it – verbal notice is easy to lose.
- Ask for a response in writing. A five-business-day window is reasonable. Note the date you sent your notice and the date by which you expect a reply.
- Keep the estimate, the contract, and the final invoice in one folder. Whether the contractor responds well or poorly, you now have everything a third party needs to review the case.
One note on why this matters: many workmanship warranties are voided by anyone other than the original contractor doing repair work. If you call another roofing company out of frustration before giving your own contractor a chance to respond in writing, you can lose the warranty on the original install. Give the written notice first. It’s the fastest path if the contractor is honest, and it’s your strongest evidence if they’re not.
Spring Valley-Specific Issues: Heat Cycles, Monsoon Rain, and Desert Wind
Roofs in Spring Valley live through a split personality. From June through September, the shingles take sustained heat – 100°F-plus air temps on top of surface temps that can push past 150°F. Every component expands. Then the first monsoon hits: wind, hard rain in 20-minute bursts, sometimes hail. The shingles that were relaxed to their maximum size an hour before the storm suddenly cool and shrink. Over years, that heat cycle does more damage to a poorly installed roof than to a well-installed one, because the failures are exposed in every cycle.
A few Spring Valley specifics we look for during any post-installation inspection:
- Pipe boots harden faster here. The rubber collars on plumbing vents degrade from UV faster in the desert than in cooler climates. If your new install used standard collars and you’re seeing cracking after one summer, that’s a materials call, not an install call – upgrading to lead or high-temp boots on the next repair is worth asking about.
- Ventilation is not optional. A roof that isn’t vented properly during install will have shingle curling at 12-36 months in Spring Valley heat. Ridge vent, soffit vent, and the right balance between them is the fix – not shingle replacement.
- Gutter falloff matters in the monsoon. Gutters installed with flat or reverse pitch work fine in a light rain and can’t handle a monsoon downpour. Re-pitching at ¼-inch per foot minimum is standard here.
- Wind-driven flashing is tested by monsoon gusts. Step flashing at walls that passed the install inspection in April can loosen under a first August storm. Any gap widening at a wall intersection after a monsoon is worth a call.
- Fascia boards near the roofline dry out. Southern Nevada’s dry air splits fascia boards that aren’t protected behind a drip edge. If your new install replaced drip edge and the fascia under it is exposed to sun, it will look fine for a year and then check and split.
If you’re outside Spring Valley proper, the same principles apply across the valley. If you’re wondering who services your area, our Ridgeline Roofing Co. Spring Valley home page has the local details.
Common Mistakes to Avoid
These are the traps we watch homeowners fall into after a roof replacement in Spring Valley. Each of them can turn a small installation fix into a full replacement if it isn’t caught early.
- Signing the final invoice before the 30-day rain check. Pay in two parts if the contractor allows it. The moment you sign off, some contractors stop prioritizing you on their schedule. Wait one rain event before you’re certain.
- Skipping the attic inspection on install day. This is the cheapest diagnostic you’ll ever do on a roof. Any daylight visible through the deck on install day is evidence. Not doing it forfeits a free early clue.
- Hiring a repair contractor before giving the installer a chance to respond in writing. This voids many workmanship warranties. Written notice first, response window second, third-party repair only after both.
- Fixing a leak without finding the source. A ceiling stain in a Spring Valley home doesn’t always point straight up. Water travels along the underlayment. If you patch the ceiling and not the roof, the next rain puts the stain back.
- Assuming granule loss is always a bad sign. Some granule loss in the first 6 months is normal settling. A quarter-cup from a downspout per rain event is normal. A colander’s worth in a single storm is not.
- Letting the first warranty period pass without a documented inspection. Your 90-day workmanship warranty period is the most protective window you have. A documented inspection at day 30 and day 80 preserves your leverage.
- Believing the street-level view. A roof that looks perfect from your driveway is not evidence that it’s installed correctly. Three or four defects can live under a roof that photographs beautifully from 40 feet below.
When to Call a Professional
Some things warrant a call, and some don’t. Call a professional if you see any of the following after a new roof: water staining on any ceiling or attic surface (even a small stain), daylight visible through the roof deck from inside the attic, an exposed nail head visible from binoculars or a second-story window, a flashing edge that has separated from the wall or chimney, a pipe boot that has cracked or lifted, an active drip from a ridge vent area, or any section of the roof visibly sagging or dipping compared to its neighbors. Also call if a gutter is detached, sagging, or draining to the wrong point – water directed into fascia or a foundation is a slow problem that becomes expensive fast.
If you’re not sure, call. Ridgeline Roofing Co. Spring Valley offers free estimates in Spring Valley – call (855) 908-1590. Phones are answered by a live person around the clock, in uniform, on the roof with a camera if needed.
Frequently Asked Questions
Most installation defects show up on the first rain after installation, which in Spring Valley is usually the first monsoon of the following summer. A few – like unsealed pipe boot collars and ventilation problems – can take 12-24 months to reveal. That’s why the 90-day inspection matters: it catches the first category before a small fix becomes interior damage. Call (855) 908-1590 for a free post-installation inspection if you’re inside that window.
Yes. A post-installation inspection at 30, 60, and 90 days catches the defects that passed the final walkthrough. Your installer’s workmanship warranty almost always has a defined period during which you can report issues – usually the first 90 days to one year. Schedule the inspection before that window closes. Free estimates and post-installation inspections are available at (855) 908-1590.
The manufacturer covers material defects – shingles that fail on their own. The workmanship warranty covers installation error – the flashing that was overlapped wrong, the nail that was exposed, the collar that wasn’t sealed. They’re separate. If your new roof is leaking from an installation defect, the manufacturer will decline the claim and the workmanship warranty is the one that applies. Ask your contractor for both in writing before signing anything.
Minor cosmetic issues – a lifted shingle at the edge of the field, a small gap at a ridge cap – are safe to photograph and report. Anything involving the underlayment, flashing, ridge vent, or anything requiring you to walk the roof is not a do-it-yourself task. Roofing is a fall hazard and the pitch can be steeper than it looks from the ground. Call us at (855) 908-1590 and we’ll tell you honestly whether it’s a real problem or normal settling.
Take two dated photos of the same spot 30 days apart. If the shape has changed measurably – a dip that wasn’t there, a gap that’s wider, a curl that’s progressing – that’s not settling, that’s movement and it deserves a call. If the shingle field is just a bit wavy after the first heat cycle, that’s normal and won’t need any action. When in doubt, a free estimate from (855) 908-1590 gives you a straight answer.
Put your complaint in writing first, with photos and a specific description of the defect. Note the date and give a five-business-day response window. If the contractor doesn’t respond, the workmanship warranty and your written notice are both enforceable in small claims court in Clark County. Then you can hire a repair contractor without voiding the original workmanship warranty, since you’ve documented why. If you’re already at that point, a free second opinion on any written estimate is available at (855) 908-1590.
The Bottom Line
The most important thing to know after a new roof goes on is that looking good from the street proves nothing. The five defects that survive a final walkthrough – exposed nail heads, inadequate flashing overlap, unsealed pipe boot collars, ridge vents seated improperly, and gutters hung back without re-pitching – all take minutes to do right and minutes to skip. Watch your roof for the first 90 days with a documented inspection at 30, 60, and 90. Notice when a shingle is settling vs. when it’s moving. Read your workmanship warranty carefully and know what it covers that a manufacturer’s warranty won’t. If something’s off, put it in writing before you call anyone else out. Done right – and if it isn’t, we make it right. That’s the standard Ridgeline Roofing Co. Spring Valley was built on, and it’s why we’ve been standing behind roofs in this community since 1984.
Ridgeline Roofing Co. Spring Valley offers free estimates throughout Spring Valley and the surrounding valley. Call (855) 908-1590 to schedule yours. All work is backed by the 90-Day Done Right Promise, and phones are answered by a live person around the clock.
Written by the team at Ridgeline Roofing Co. Spring Valley.
See the difference
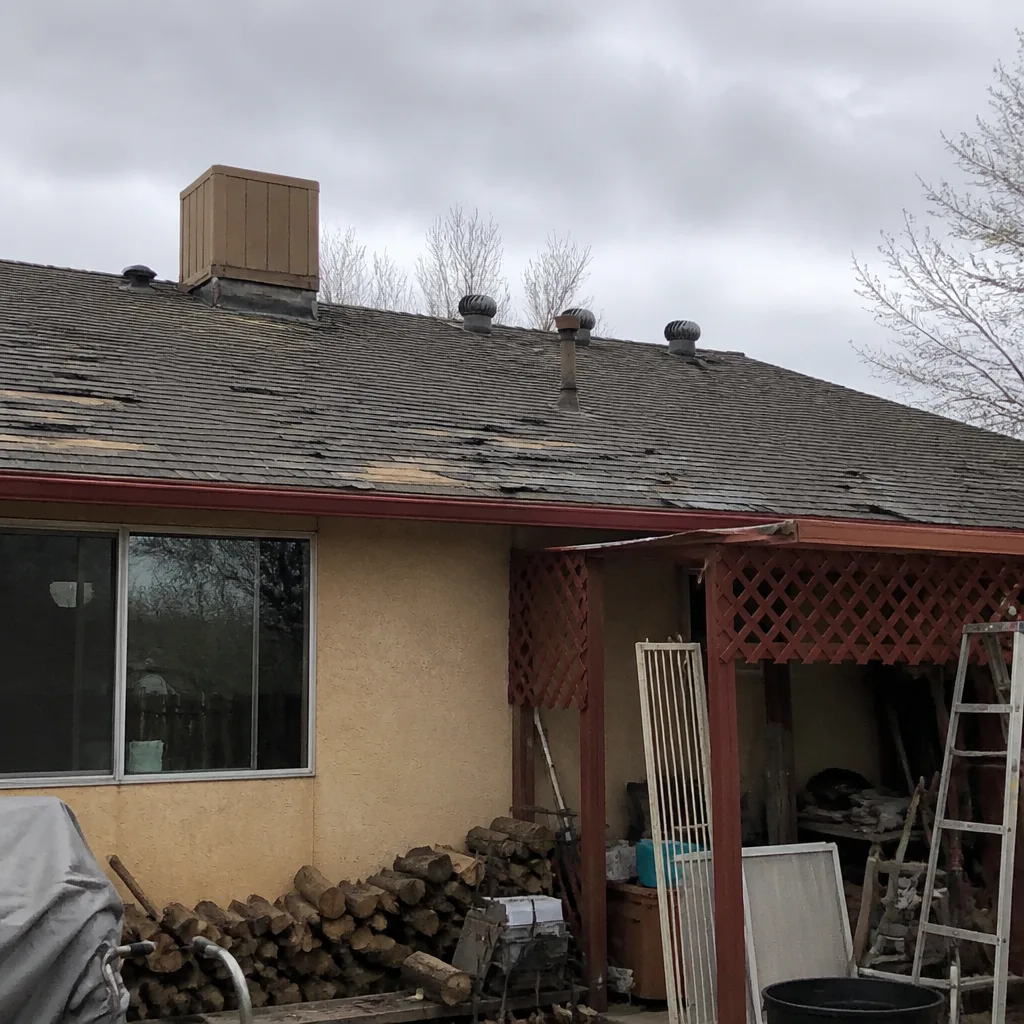 Before
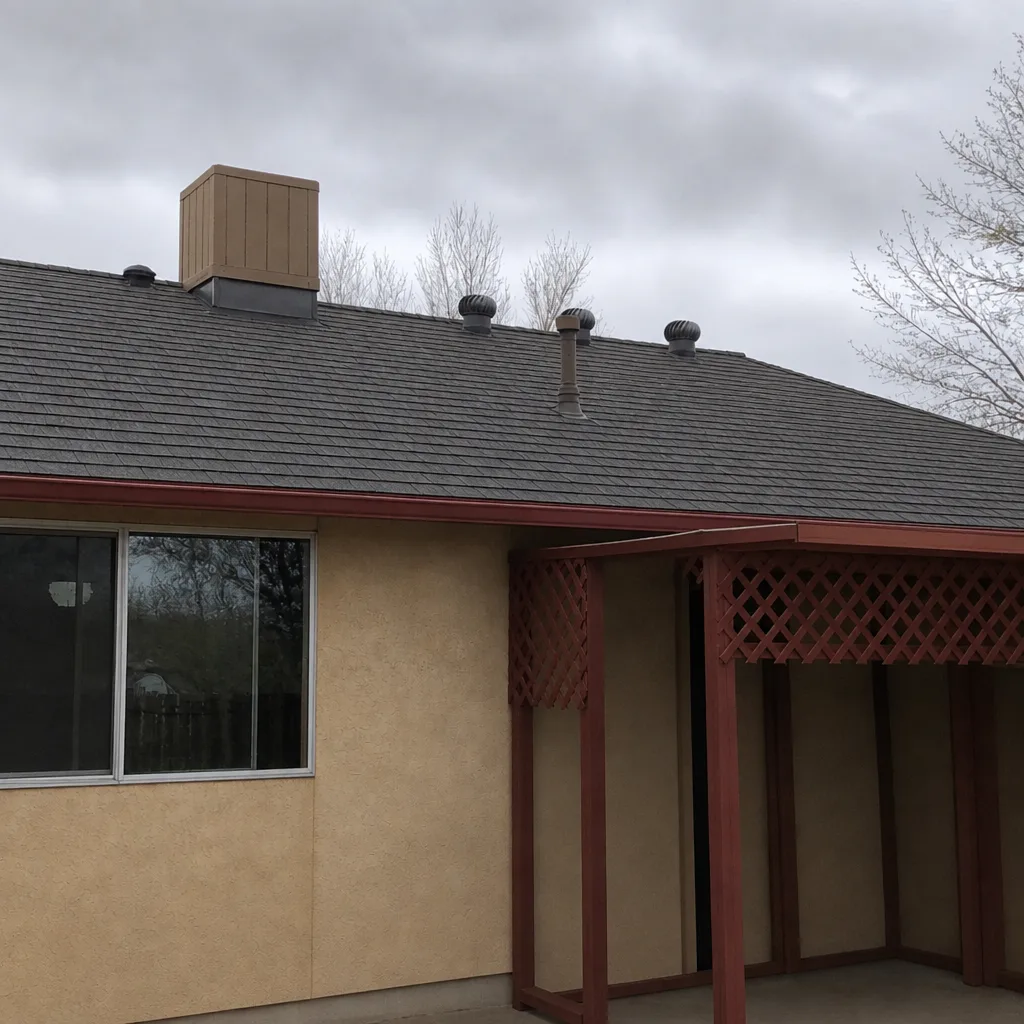 After
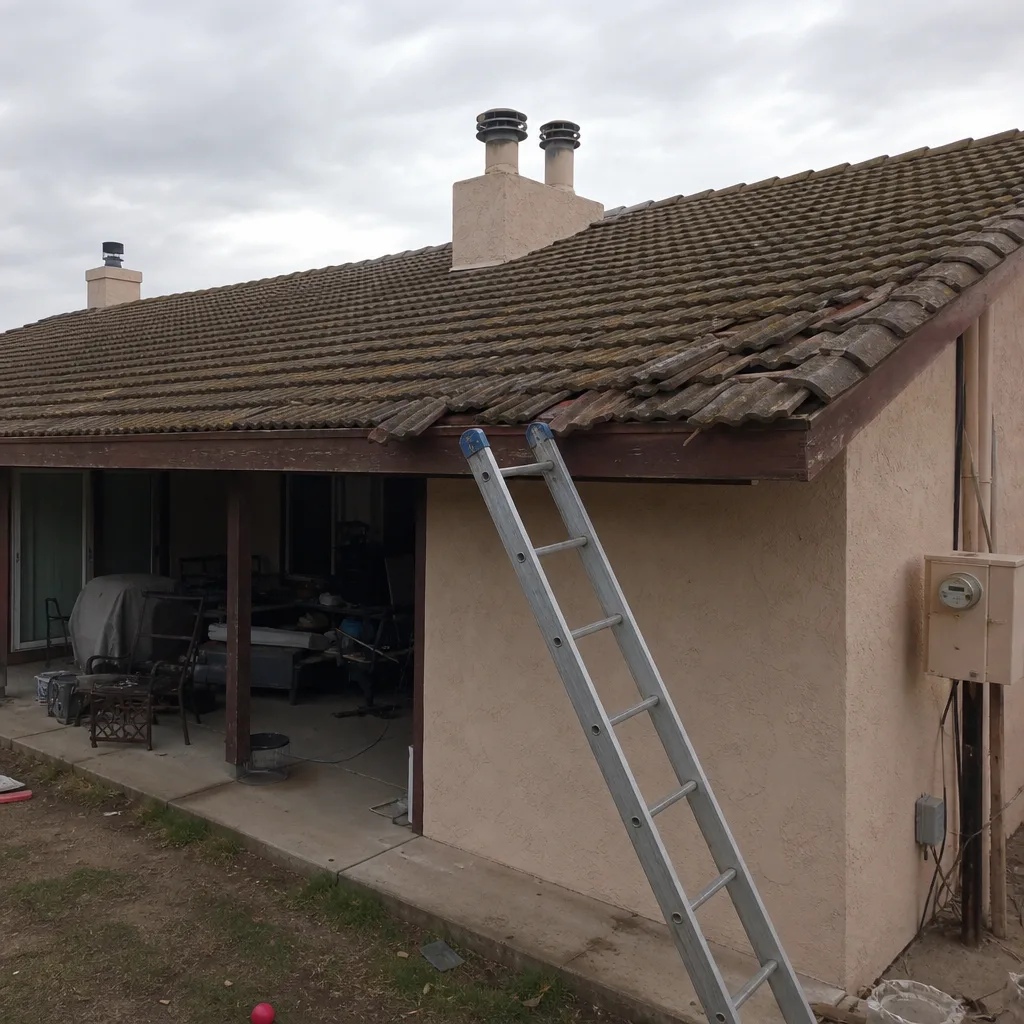 Before
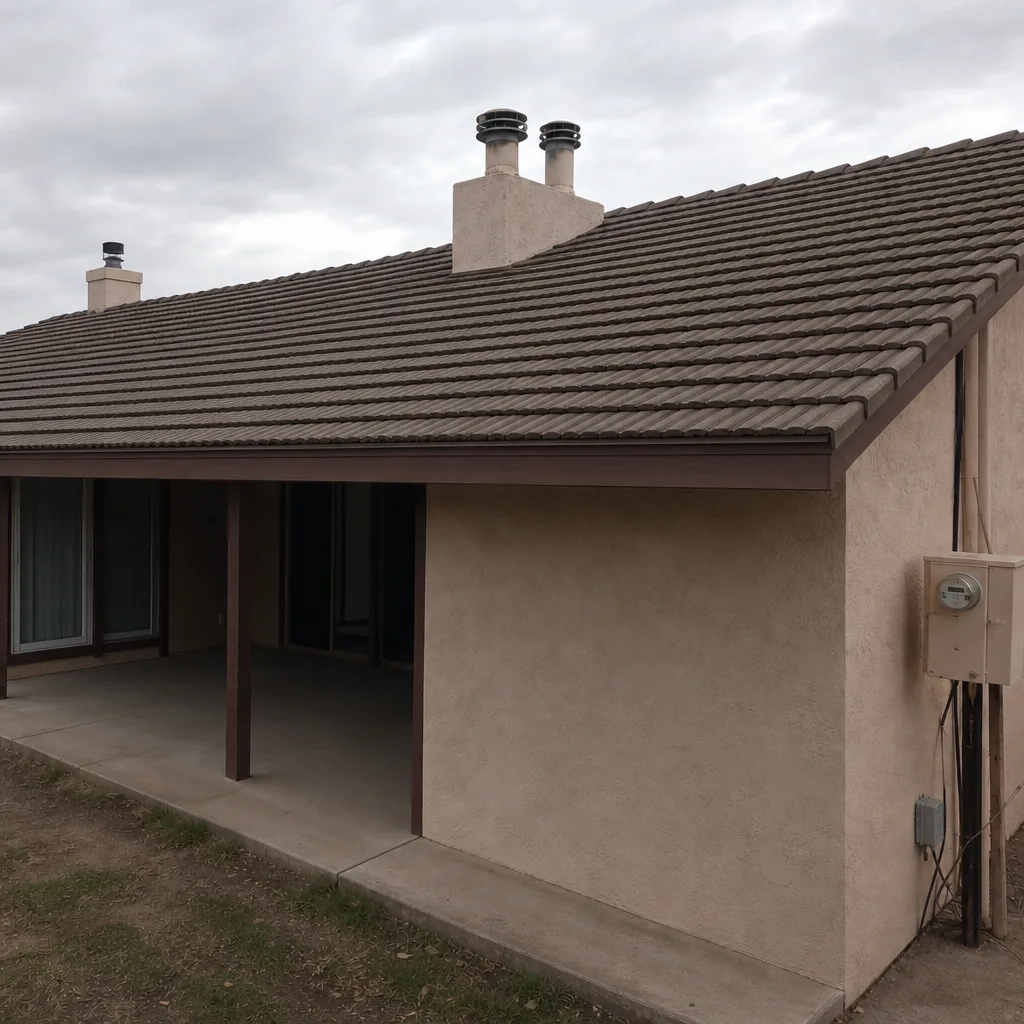 After
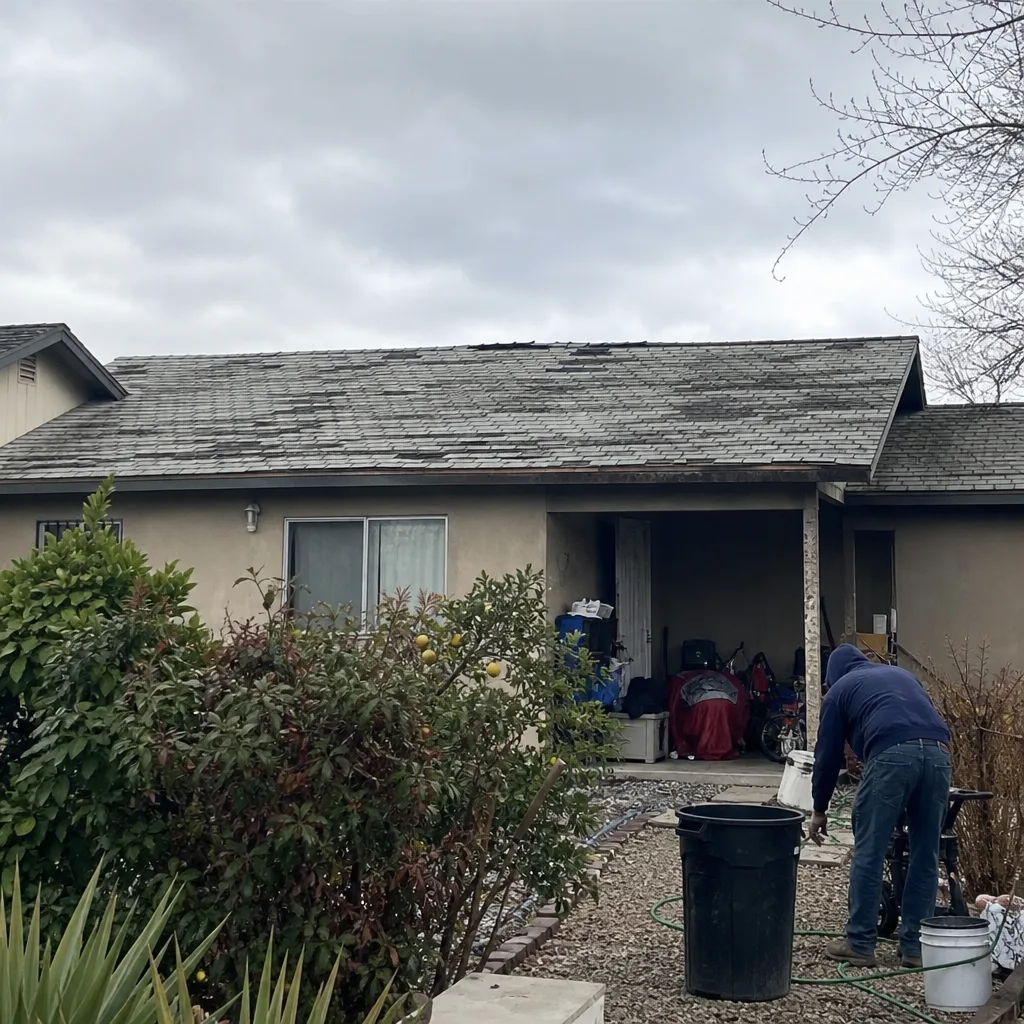 Before
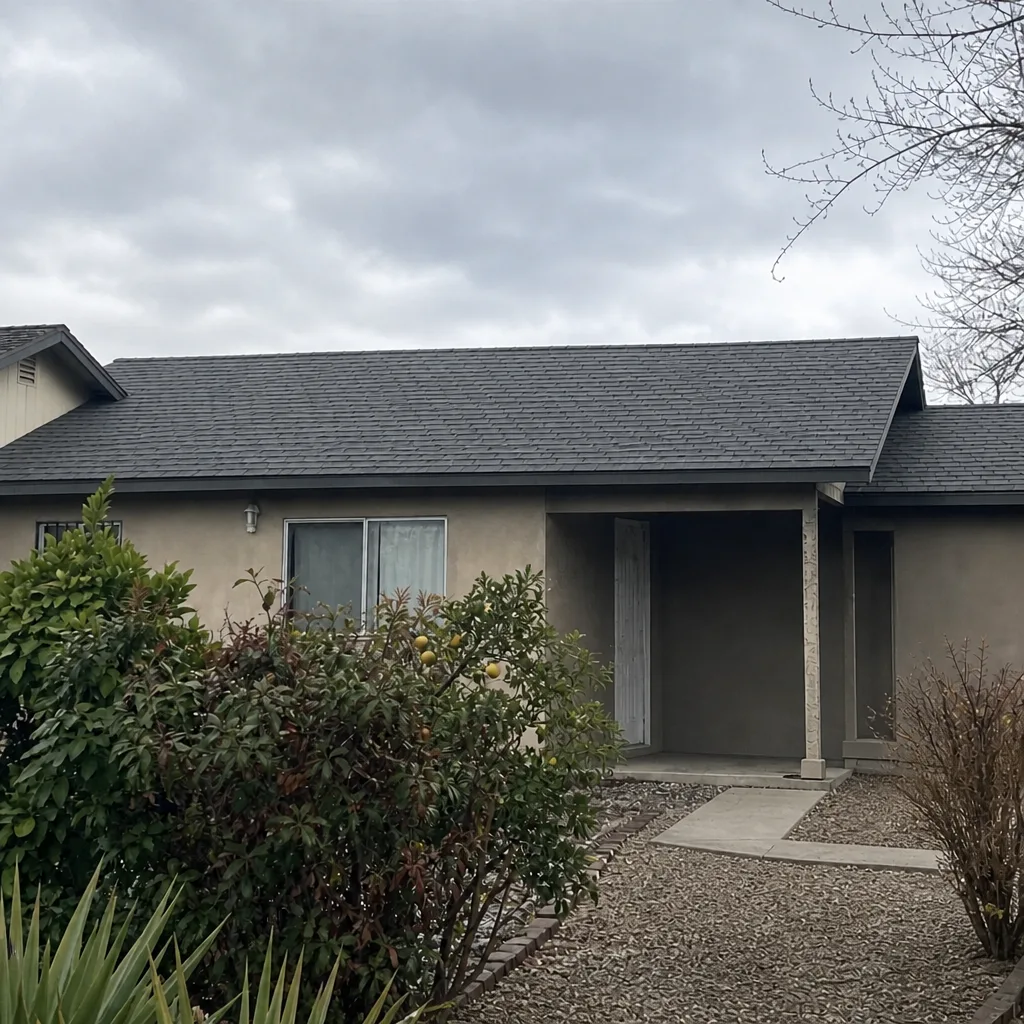 After