
Last updated November 17, 2026
 Architectural shingles
 Metal roofing
 Tile roofing
 GAF
 Owens Corning
 Flat & low-slope
Free roof inspection with deck photos before we talk money - GAF and Owens Corning certified installation
Emergency & Storm Damage Troubleshooting: Common Problems and How to Fix Them
Water on a ceiling after a storm almost never entered the roof directly above that stain. In our experience across Spring Valley, the entry point is regularly three feet away or thirty feet away, following a rafter, a truss chord, or a run of blown-back insulation before it finds a seam in the drywall and drips. Trace it wrong and a $400 flashing repair turns into a $4,000 tear-out of wet sheathing, soaked insulation, and mold remediation. Trace it right and most storm damage is a manageable, insurable repair. This guide covers how to follow water back to its true source, the five most common post-storm failure points on a residential roof, the interior steps that actually protect your structure, and the evidence checklist that keeps an insurance claim clean. It is written from Spring Valley, where monsoon-season wind and quick, heavy rain test roofs every summer.
Quick Answer
The water on your ceiling came in through a roof defect somewhere other than the spot you’re looking at, and it traveled along framing before soaking through the ceiling. The fastest way to find the real entry point is to get into the attic with a flashlight during or right after the rain and look for wet rafters, discolored insulation, and water tracks, then match what you see against the five common failure points: flashing, ridge cap, pipe boot seals, drip edge, and valley metal. Call a professional before you step onto the roof, and photograph everything first for your insurance claim.
Styles & brands we work with
- Architectural shingles
- Metal roofing
- Tile roofing
- GAF
- Owens Corning
- Flat & low-slope
Table of Contents
- How to Trace a Ceiling Stain Back to Its Roof Entry Point
- The Five Most Common Post-Storm Damage Points on a Roof
- Wind-Driven Rain Leaks vs. Impact-Breach Leaks: Why They Look the Same Inside
- What to Do Inside Right Now: Buckets, Ceiling Bubbles, and What Not to Remove
- Building the Evidence Checklist for a Clean Insurance Claim
- Why Spring Valley Storms Hit Roofs the Way They Do
- Common Mistakes to Avoid
- When to Call a Professional
How to Trace a Ceiling Stain Back to Its Roof Entry Point
Do this from inside the house, not on the roof. The most expensive mistakes happen when a homeowner climbs up during or just after a storm and creates a second problem on a wet, slippery surface.
Start at the attic access hatch. Bring a bright flashlight, a notebook, and your phone for photos. Enter the attic safely, watch where you step (only on solid framing or a walkway, never on unsupported drywall or loose insulation), and give your eyes a minute to adjust. Then work in this order:
- Find the stain from above first. Locate the ceiling stain’s rough position, then look at the attic side of that ceiling. Wet drywall looks darker and softer from above, and the sheathing or furring may show moisture too.
- Look up and out from the stain. Water obeys gravity and framing. Follow the rafters and truss chords uphill from the stain. Wet wood darkens, and you may see a thin track of moisture or a dried water line running along the lumber.
- Check the insulation. Discolored, compressed, or damp insulation is a reliable map. Insulation holds water and shows a wet patch or a rust-colored ring long after the surface dries. A wet patch of insulation well uphill from the stain points you toward the true entry.
- Read the rafters. Look at the underside of the roof sheathing and the rafters for dark streaks, water lines, and rust on nails. Rusty nail heads in a straight line often mark a leak path running along a seam or a batten.
- Confirm the point. When you’re directly under the wet sheathing, look for the failure above: a lifted shingle, exposed nail, or a gap at a flashing line you can see from inside or from the eave with a ladder at the edge.
Write down the location in plain terms: which room, how far from the exterior wall, and which direction the moisture ran. That note is what makes a repair estimate accurate instead of guesswork. If your attic is inaccessible, cramped, or the moisture is severe, we recommend stopping and calling for a documented inspection. Our team at Ridgeline Roofing Co. Spring Valley photographs every inspection from your actual roof so you see what we see, with no speech in the driveway.
The Five Most Common Post-Storm Damage Points on a Roof
On a typical home in Spring Valley, storm water finds the same handful of weak points. Each failure leaves a different visual signature. Learning to read them saves you from paying to fix the wrong thing.
- Flashing (where the roof meets a wall, chimney, or skylight): Look for separated or lifted metal, dried sealant that has cracked, and rust along the seam. Inside, you’ll often see damp wood right at the wall line and a stain near the wall’s base on the ceiling. Flashing failures are common after wind because the metal lifts and the seal behind it opens.
- Ridge cap: The shingles folded over the peak are the most wind-exposed part of the roof. After a strong storm, look for missing or curled cap shingles and exposed nails along the ridge. Inside, moisture shows along the ridge line itself or on the top chord of a truss, sometimes several feet from any ceiling stain.
- Pipe boot seals: The rubber collar around plumbing vents (the pipe sticking out of your roof) cracks with sun and age. Look for a split or hardened boot. Inside, you’ll see a small, well-defined damp spot tracking straight down from the pipe, often low on the roof near a bathroom.
- Drip edge: The metal strip at the roof’s edge guides water into the gutter. If it’s bent, lifted, or missing, water blows back under the shingles at the eave. Inside, look for wet fascia and a stain high on an exterior wall or near the eave line.
- Valley metal: Where two roof planes meet, the valley carries heavy water volume. Debris collects there, and wind can lift the shingles over the metal. Look for exposed metal, a gap, or shingles flapping at the valley. Inside, you’ll see water tracking along a valley-framing member and staining a ceiling well away from the valley itself.
Whichever signature you find, the repair is a targeted fix, not a full replacement. That distinction matters when you call for an estimate, and it matters for your claim. If the damage is broader than a single point (multiple failures, widespread lifting, or missing shingles across a plane), a roof repair in Spring Valley assessment will tell you whether a patch or a larger repair is the square call.
Wind-Driven Rain Leaks vs. Impact-Breach Leaks: Why They Look the Same Inside
From the ceiling, both look like water. From the roof, they are completely different problems, and they require different repairs and different insurance arguments.
Wind-driven rain forces water sideways and up, getting under shingles, flashing, and into seams that would never leak in a normal rain. It’s common in Spring Valley’s summer monsoon winds, where rain drives nearly horizontal. The key point: the shingles themselves may be intact. The failure is an opening at a flashing line, a lifted shingle edge at a valley, or a seal that opened. These leaks often appear only during wind-driven storms and dry out afterward. The repair is resealing, re-securing, or replacing flashings and re-establishing water-shedding detail.
Impact-breach leaks come from something striking the roof: hail, flying debris, or a fallen branch. The shingle mat is damaged or the sheathing is cracked. These leaks appear whenever it rains, not just in wind, and often leave a physical mark. The repair involves replacing the damaged shingles or sheathing, and this is the type that most commonly supports an insurance claim for storm damage.
Here’s why the distinction matters: if you ask for a repair on a wind-driven rain leak and the estimator treats it as a breach, you may pay for work you didn’t need or miss the real opening. Have the contractor confirm which one you’re facing. When we inspect in Spring Valley, we take photos of the failure itself, from your roof, so the reason for the repair is visible. Which means the repair matches the cause, not a guess.
What to Do Inside Right Now: Buckets, Ceiling Bubbles, and What Not to Remove
Your first hours after a leak should protect the structure, not the roof. The roof is out of reach safely in a storm. The inside isn’t. Here’s what actually helps, in order.
- Contain the water. Place buckets and tubs under drips, and lay towels or plastic sheeting on flooring and near walls. If water is running down a wall, dry the base of the wall and the floor edge to limit moisture creep.
- Relieve a water-filled ceiling bubble. If the drywall is sagging and bulging with trapped water, it can collapse. Rather than letting it burst, carefully make a small pinhole at the low point with a nail and let the water drain slowly into a bucket below. This is a controlled relief, not a repair. It keeps the failure contained to a small spot instead of a large section of ceiling.
- Raise the room’s temperature and air movement. Run a fan and, if safe, a dehumidifier to begin drying. Prompt drying limits mold growth.
- Do not remove soaked insulation if you can reach it safely. Pulling wet insulation away from the ceiling allows the area to dry, but if it’s out of reach or the moisture is extensive, leave it for the professionals and document it for the claim.
- Do not cut into the ceiling or the roof yourself. Removing drywall or shingles to “see what’s going on” damages the evidence and can make a repair larger. Photograph it instead.
Relieving a ceiling bubble is the one step that’s genuinely worth doing before anyone arrives, because a ceiling that collapses damages flooring, furniture, and insulation. Everything else is best left documented and contained. For a free estimate on the actual repair once the storm has passed, call us at (855) 908-1590.
Building the Evidence Checklist for a Clean Insurance Claim
A clean claim is a documented claim. Insurance adjusters work from what they can see and verify. If you capture the right evidence in the first 48 hours, before things dry and you clean up, the claim moves faster and with fewer questions.
Photograph and record these items:
- Wide shots and close shots of every stain, on the day you notice it. Include a photo of each stain with something recognizable in the frame so scale is clear. Wide shot first, then a close-up.
- The attic side. Photograph wet rafters, discolored insulation, rusted nails, and water tracks from above the stain. This is the evidence most homeowners miss.
- The exterior failure point, from the ground. Use your phone’s zoom to capture lifted shingles, missing ridge cap, split pipe boots, bent drip edge, or valley damage.
- Measurements that matter. Note how far each stain is from the nearest exterior wall and from room corners. Jot the room name on each photo note. Also note how many shingles appear damaged on each roof plane.
- Timestamps. Keep your phone’s date and time on for all photos. Note the date of the storm and the date each photo was taken. The gap between storm and leak appearance is part of the story, especially for wind-driven rain leaks.
- Interior damage in detail. Wet drywall, damaged flooring, warped trim, damp furniture, and any water that reached the basement or slab. Photograph every affected area before you move anything.
- Receipts for anything you buy. Tarps, dehumidifier rentals, and fans count toward the claim in many cases. Keep them.
One tip we give homeowners in Spring Valley: take one sweeping video walking through the damaged area before you clean up. It’s faster than a dozen photos and captures the relationship between rooms, ceilings, and walls for the adjuster. Then keep a written estimate from a contractor who documented the damage with photos, so the claim is backed by evidence, not opinion. If you need a free second opinion on a written estimate, we provide one as a standing offer.
Why Spring Valley Storms Hit Roofs the Way They Do
Not every market sees the same storm damage, and Spring Valley has its own pattern. The combination of intense sun and sudden monsoon wind and rain is hard on roofs here in a way that differs from a wetter climate. Heat and UV cure shingle seals over time, which means a spring that still looks intact after a decade may be brittle. When the first real monsoon wind hits it, seals that would have held on a cooler roof crack and lift. This is the single most common cause we find in Spring Valley: a roof that is aged and sun-faded, then lifted by wind rather than struck by debris.
The other Spring Valley pattern is rapid, high-volume rain over short periods. Where shingles are just beginning to fail at a valley or around a pipe boot, a roof that shrugs off a light rain can leak in a hard downpour. The water volume exceeds what the aging detail can shed. That’s why we take photo-documented inspections seriously, from the actual roof, because the problem often isn’t visible from the ground and doesn’t show itself until the right storm.
Where the failure is specific and the decking is sound, a targeted repair is the honest answer. Where a plane of shingles is at the end of its life, replacing it before the next storm is the square deal. Our roof replacement & installation in Spring Valley work uses authorized materials from manufacturers like IKO and Atlas, so the fix lasts. Because a repair done twice costs more than a replacement done right.
Common Mistakes to Avoid
- Assuming the stain is under the leak. Water travels along framing before it shows. Get into the attic and trace it uphill before you authorize any repair.
- Climbing onto the roof during or right after a storm. Wet roofing is the most dangerous surface on your property, and a fall changes everything. Wait for safe conditions and let a trained technician do the inspection.
- Treating a wind-driven rain leak as damage. If the shingles are intact and the leak only happens in driving rain, the fix is often a reseal or a flashing detail, not a claim. Misdiagnosing this either inflates the repair or misses the cause.
- Cutting into the ceiling yourself to find the leak. It damages the evidence and enlarges the repair. Let the water drain through a pinhole, document, and let a professional open it if needed.
- Cleaning up before you photograph. Once the buckets are gone and the towels are down, the adjuster can’t see what you saw. Photograph and video first, clean second.
- Hiring whoever shows up first with a tarp. Spring Valley sees its share of out-of-town crews after storms. Ask whether the contractor will be in town in thirty years, and get the workmanship guarantee in writing.
- Ignoring the small stuff. A split pipe boot or a bent drip edge costs little to fix now and a lot to fix after a season of water. Handle it before the next storm.
When to Call a Professional
Call a professional when any of the following is true: water is actively running and you can’t contain it; a ceiling is sagging or bulging and you’re not comfortable relieving it; the stain is in an area you can’t safely access from the attic; you’re seeing multiple failure points or missing shingles across a plane; the same roof has leaked twice; or you’re preparing an insurance claim and need photo-documented evidence. Wind-driven rain and impact damage often require a trained eye to tell apart. Ridgeline Roofing Co. Spring Valley offers free estimates in Spring Valley. Call (855) 908-1590, and a live person answers, day or night, including the middle of a storm. We’ll document what we see and give you the upfront price before any work starts. No surprises, no runaround.
See the difference
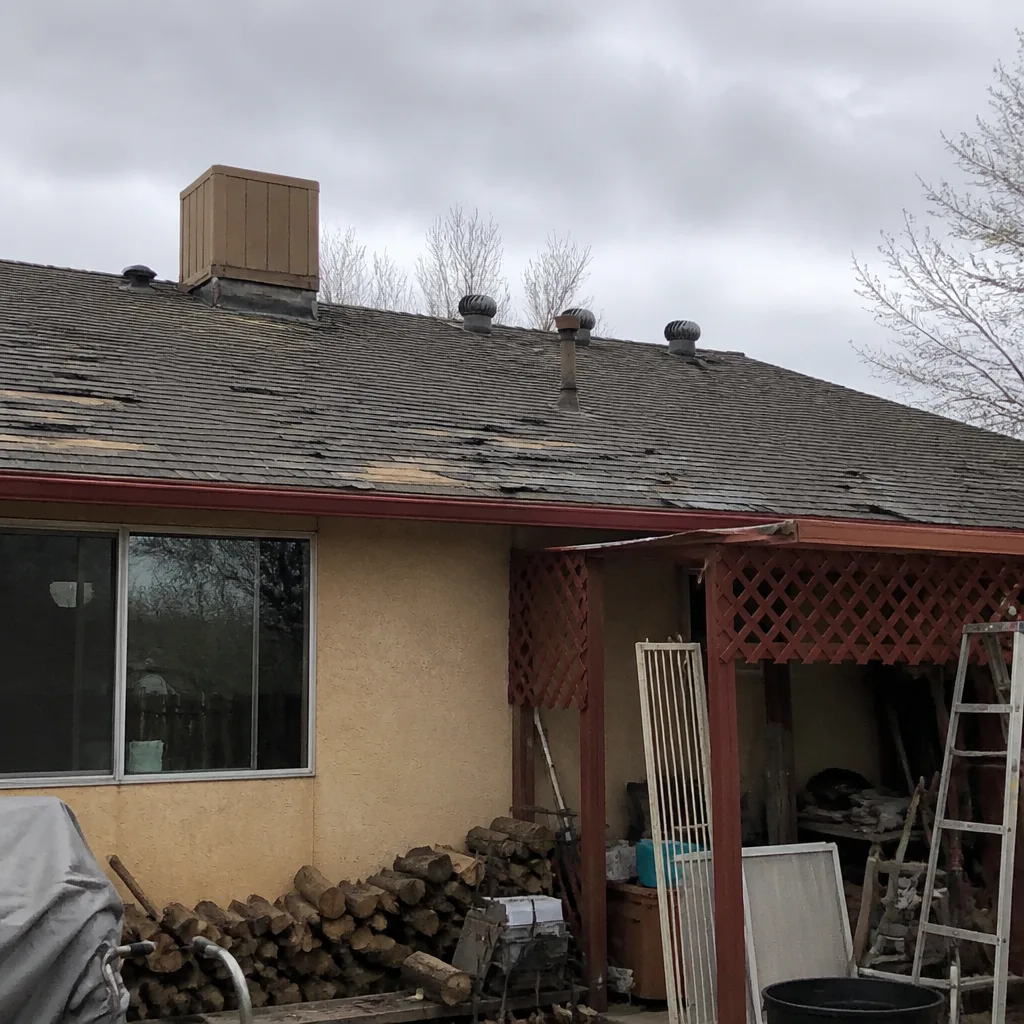 Before
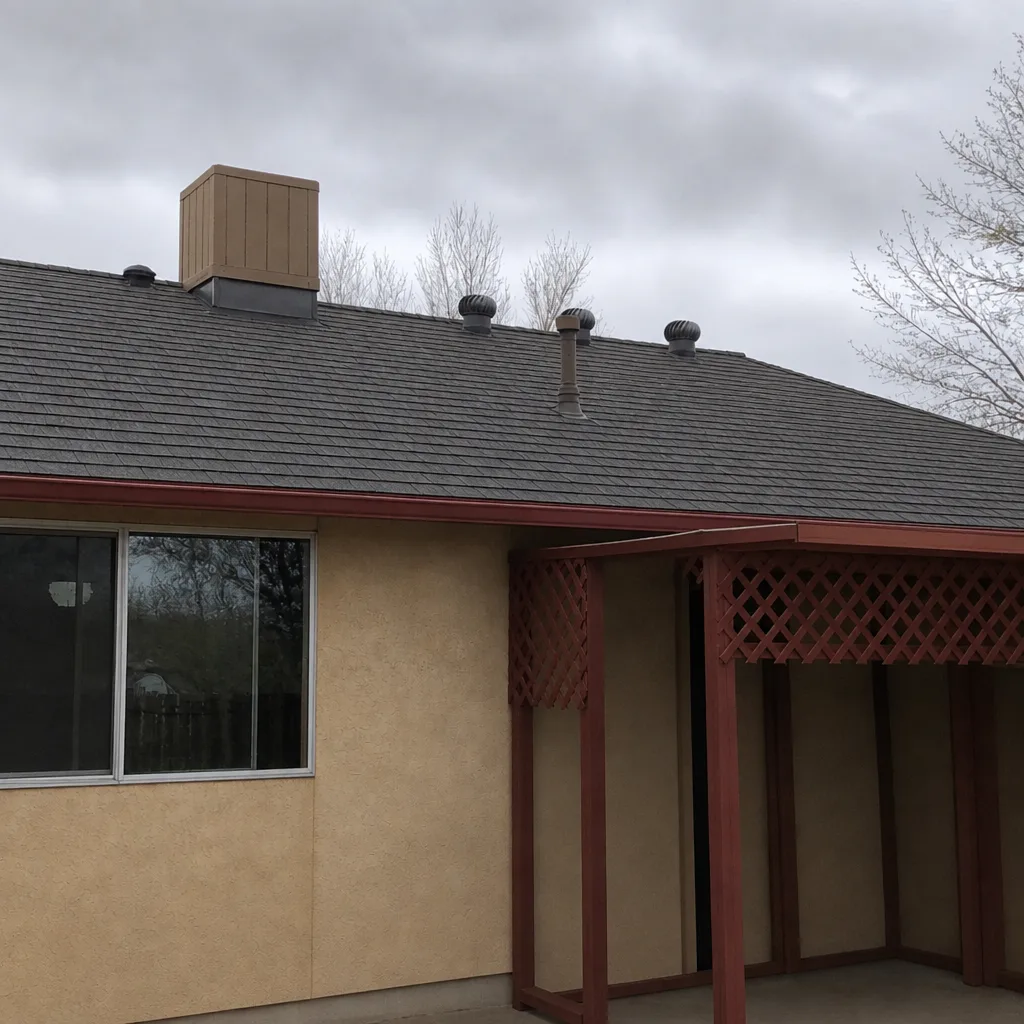 After
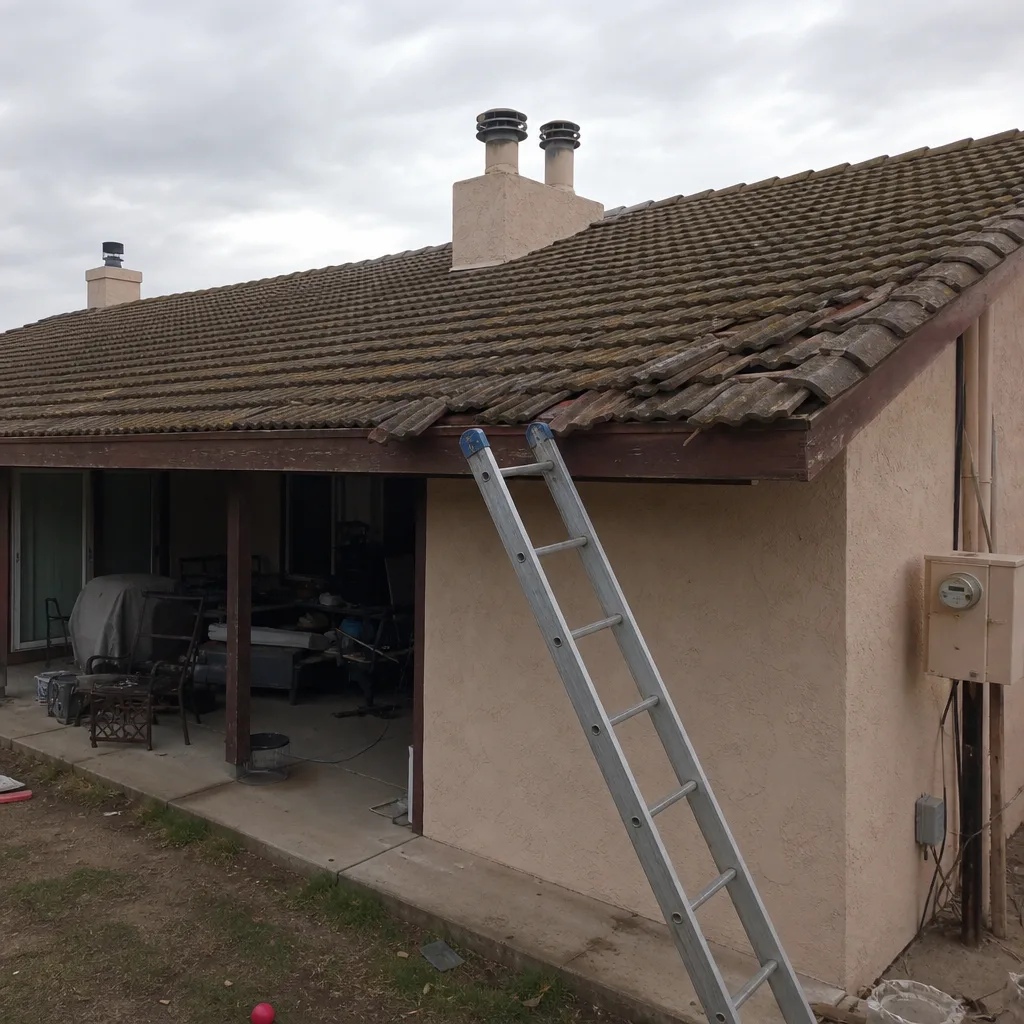 Before
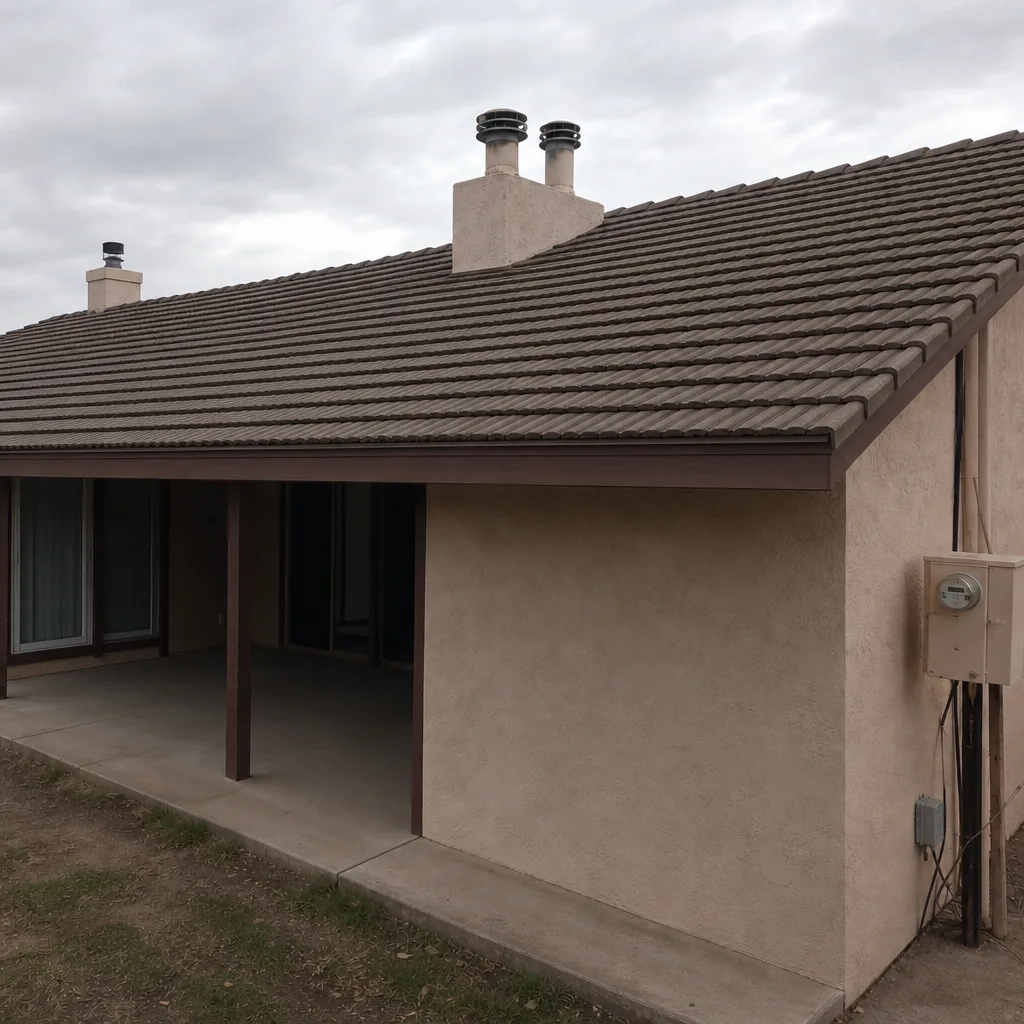 After
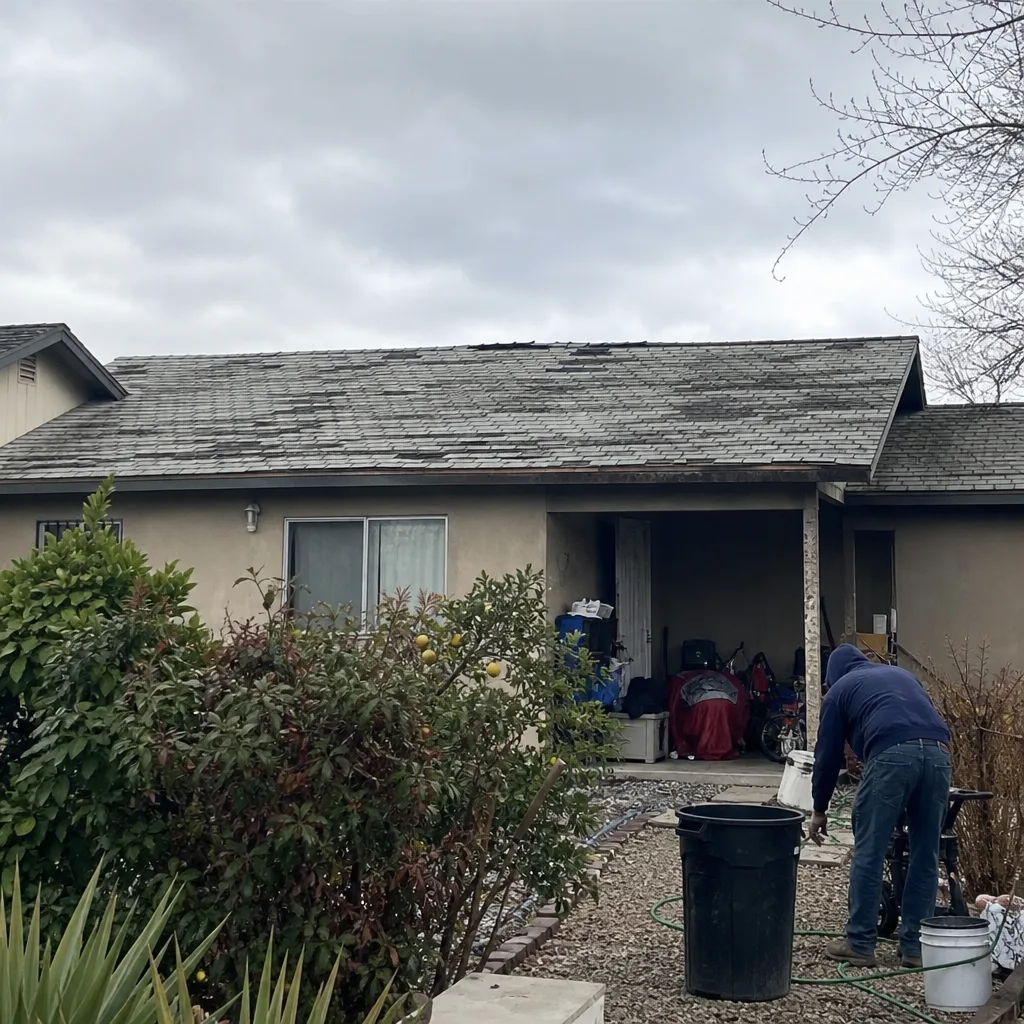 Before
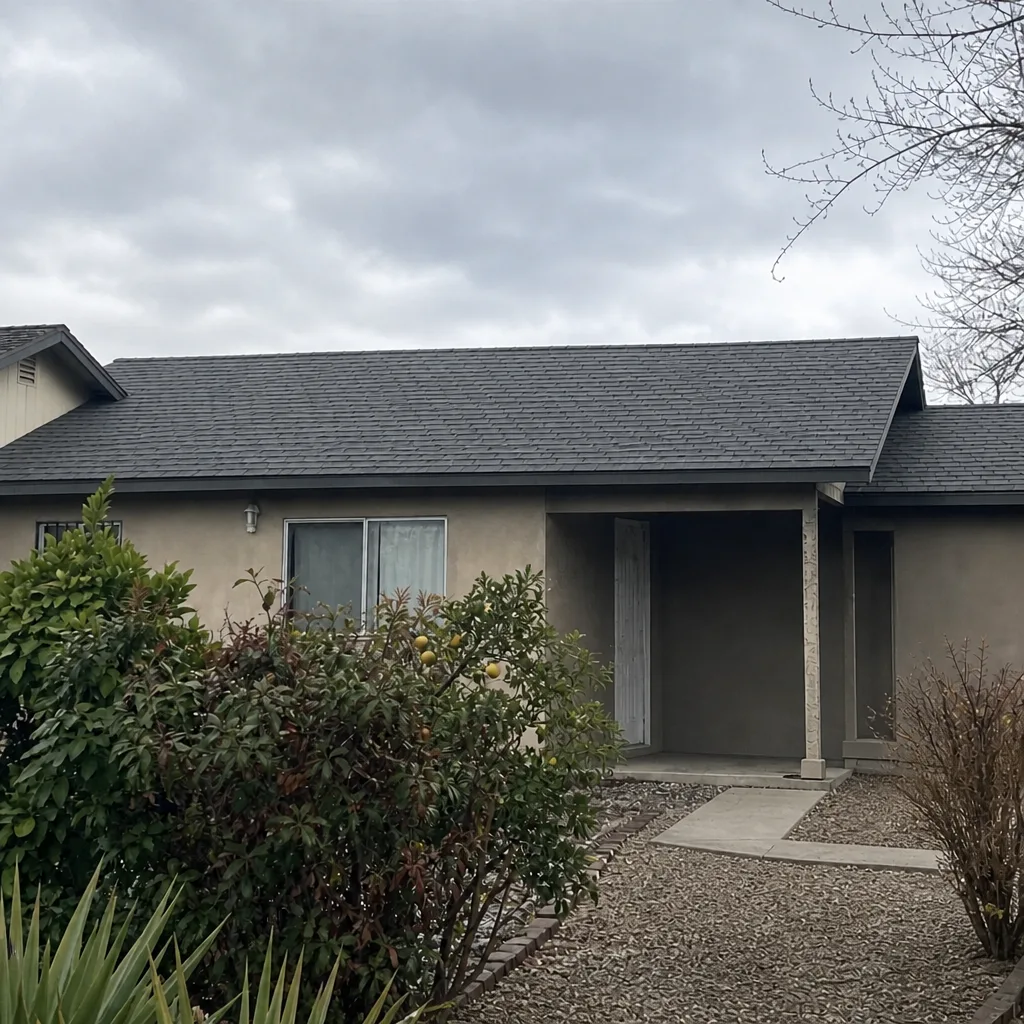 After
Frequently Asked Questions
Water follows the path of least resistance along framing before it soaks through drywall. It can run along a rafter for several feet and pool in one spot, so the stain is often not below the entry point. That’s why tracing uphill in the attic matters more than guessing at the roof.
Interior containment is safe and worth doing. Roof work is not a safe DIY job after a storm. Wet shingles, height, and the risk of further damage make it a professional matter, and self-repair usually damages the evidence an insurance claim depends on. For the repair itself, call (855) 908-1590 for a free estimate.
Wind-driven rain gets under intact shingles and flashings and often leaks only in strong storms. Impact damage from hail or debris breaches the shingle or sheathing and leaks in any rain. Inside, they look the same; on the roof, they’re different repairs and different claims. A documented inspection settles which one you have.
Every stain (wide and close), the attic side of the damage, the exterior failure point, affected flooring and interiors, and each photo’s timestamp. Add measurements and a walk-through video before you clean up. Then get a written estimate backed by photos so the claim is evidence-based, not guesswork.
Yes. When attic access is limited, we inspect from the roof and document the failure points that commonly feed a given stain location. The photo record lets you see exactly what we see. Call (855) 908-1590 and we’ll schedule a free estimate.
Where a repair requires a permit, yes. Permit requirements vary with the scope of work, and we handle that part of the job properly rather than skipping it. Ask us at the estimate and we’ll tell you what your repair needs. Estimates are free at (855) 908-1590.
The Bottom Line
The costliest storm damage comes from misreading a leak in the first two days. Trace the water uphill in the attic before you call for a repair. Match the failure to one of the five common points. Distinguish wind-driven rain from impact damage. Contain the water inside, relieve a ceiling bubble through a pinhole, and don’t cut or remove anything until you’ve photographed it. Build your evidence checklist the same day you notice the damage. Then get a documented inspection and a written price before anyone touches the roof. Every job we do is backed by the 90-Day Done Right Promise: done right, and if it isn’t, we make it right. That’s the square deal you’re looking for when it rains again. Visit Ridgeline Roofing Co. Spring Valley home for more, and see our specialty roofing in Spring Valley work for the details that don’t fit a standard repair.
Contact
If you’re facing a roof leak after a storm in Spring Valley, the right move is a documented inspection before you authorize a repair. Call Ridgeline Roofing Co. Spring Valley at (855) 908-1590 to schedule your free estimate. A live person answers every call, day or night, and you’ll get a written, upfront price before any work begins. Most jobs are completed in a single visit, backed by the 90-Day Done Right Promise and authorized materials from GAF, CertainTeed, Owens Corning, IKO, Atlas, Tamko, and Boral. We stand behind it: no paperwork, no arguing.
Written by the team at Ridgeline Roofing Co. Spring Valley.